Chief KWS220B Instruction Manual Page 6
- Page / 16
- Table of contents
- BOOKMARKS
- INSTALLATION INSTRUCTIONS 1
- Small Flat Panel Mounts 1
- Model: K-Series 1
- CONTENTS 2
- SPECIFICATIONS 3
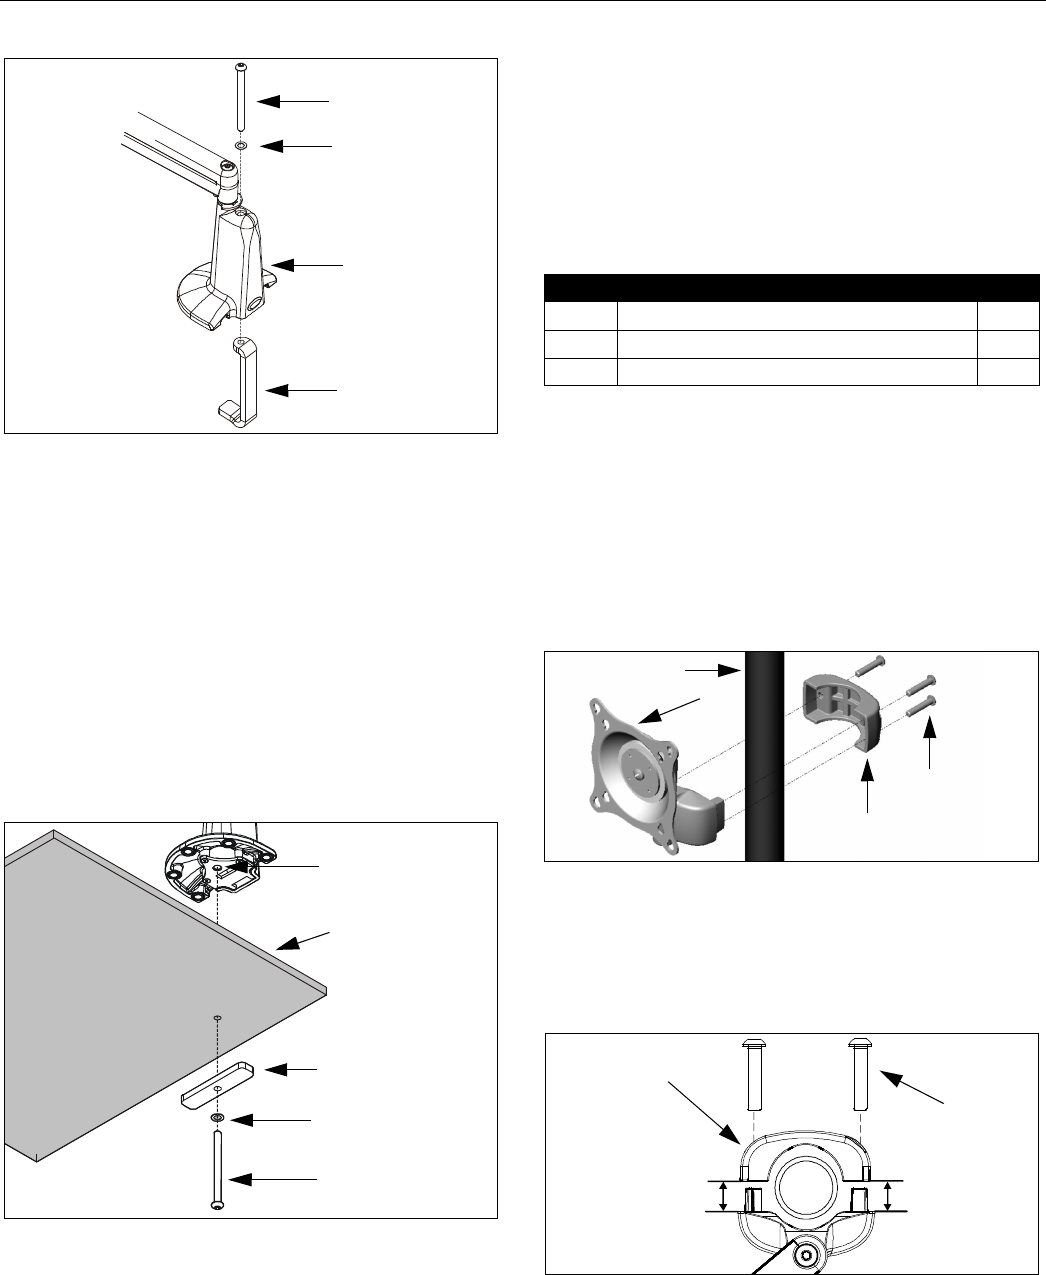
- MOUNT INSTALLATION 4
- INSTALLATION TO DESK 5
- INSTALLATION TO POLE 6
- DISPLAY INSTALLATION 7
- DUAL / TRIPLE DISPLAY 8
- (ALL EXCEPT KCY-210/-220) 8
- ARRAY ASSEMBLY 9
- (DUAL / TRIPLE DISPLAY; 9
- ALL EXCEPT KCY-210/-220) 9
- MULTI-DUAL ARM ASSEMBLY 10
- CABLE MANAGEMENT 11
- ADJUSTMENT 12
- CENTRIS HEAD 13
Related products and manuals for Flat panel accessories Chief KWS220B
 (4 pages)
© 2020, manymanuals.com. All rights reserved. | 4.713 s |
 Manymanuals.com
 Manymanuals.de
 Manymanuals.fr
 Manymanuals.it
 Manymanuals.pl
 Manymanuals.cz
 Manymanuals.es
 Manymanuals-pt.com
Comments to this Manuals